Showing posts with label Farm Life. Show all posts

Friday, April 1, 2016

Making Tomato Sauce From Frozen Tomatoes

I have finally processed the last of my frozen tomatoes. I still had about 30 lbs in the freezer and needed to free up that freezer space.  I have already canned lots of tomatoes and more salsa than I can count, so I figured we need some tomato sauce.


Now, I love freezing our garden tomatoes whole in the fall.  That way I free up my time to process the other garden fruits and veggies in the busy season.  Then, when everything has quieted down and I feel like canning, I have them ready.

Also, when you freeze tomatoes and after they thaw, the skins just slip off. So no need for boiling them.  Bonus!!!

The skins didn't really bother me for this recipe anyway.  Garden grown tomatoes tend to have thinner skins and I was running them through my food processor.

Tomatoes thawing out.

Ready to be processed.

I just made a very simple recipe.  I cooked 3 chopped onions in about 1/2 olive oil.  Then I added 8 cloves of minced garlic.  Then I added all the processed tomatoes and salt and 2 Tbsp crushed chili peppers.  I cooked this until it reduced by about 2 quarts. Then I added a big can of crushed tomatoes and 156 ml can of tomato paste.

I'm sure I could have processed the jars in a water bath, but I chose to do it in my pressure canner because of the oil.

I ended up with 18 pints when it was all done and now I finally have a little bit of freezer space.

Thanks for stopping by.

Crystal


2 Corinthians 9:6

6 But this I say: He who sows sparingly will also reap sparingly, and he who sows bountifully will also reap bountifully.

Friday, July 31, 2015

Why and How I Pollinate Our Pumpkin and Squash Plants

Our pumpkin patch is doing OK this year.  Some of the plants are so far behind, but I'm hoping they start to set fruit soon.

When I tell people I pollinate our pumpkin and squash plants by hand, they look at me like I'm talking a foreign language.  They tell me they never knew anything about squash pollination.

First, I'll you the reasons why I do this. Then I will show you how I do it.

Reason No. 1 -  I can't trust the bees to do it for me.  Have you ever noticed a squash or pumpkin get to be about 2 inches big, then shrivel up and fall off the vine?  That is because it wasn't pollinated.  We really don't have that many bees here and we have so many pumpkin plants that I don't think they can keep up.

Reason No. 2 - I don't want cross pollination on our heritage varieties.  For us, this really only applies to our zucchini and acorn squash right now.  All of our pumpkins are hybrids, so it doesn't matter for them.  When you have cross pollination, the seeds won't grow the same exact plant you got the seeds from.  I save our zucchini and acorn squash seeds and want to know what I'm planting.

Those are the the 2 most important reasons.  Now on to the technique.

First, I get outside in the morning, before it gets too hot.  The flowers only are open in the morning and I don't want to miss them.

Then I look for the female flowers.

You know it's a female flower, because it has a little fruit at the base of it.  They also usually grow along the bottom vines.
Here is the centre of the female flower.

Then, I look for a male flower.

The male has the long stamen in it with the pollen all along it.
I break the male flower off, leaving some of the stem.  Then I tear off all the petals, leaving just the stamen.  Then I rub the stamen all inside the female flower.


And that should do it.  All squash plants work the same way.

Although I go out every morning, I still don't see every female flower.  When I really start looking, I have found a few pumpkins that never got pollinated and have fallen off the vine.  I have also found a couple big pumpkins that the bees got to before me and I didn't even know they were growing.  I love it when the vines start to die and I find quite a few pumpkins that were sneakily growing with no one knowing.

Thanks for stopping by!


This post is linked up to;  The Homesteading Hippy  Raising Homemakers  Little Family Adventure
Pieced Pastimes

Wednesday, July 29, 2015

Berry Patch - Deep Mulch

I am so leery of even blogging about this. It seems every time I do blog about something I am trying, it turns out in failure.  The idea of this seems good to me though and maybe some of you have some experience you can share with us as well.


I have been able to get a lot of wood chips from a very nice neighbour of ours. They have a deal with the tree clipping company to drop their tree mulch off at their house.  So, I wanted to mulch our berry patch very deeply to keep weeds at bay.


You can't tell, but the plants at the bottom of the above picture are blueberries and rhubarb.  There is a row of raspberries at the top.

Before I shoveled all the mulch out there, I laid down folded cardboard boxes and then topped those with about 4 inches of mulch.  I left 4 holes in between each row of fruit to plant all our squash plants. All the fruit are new transplants,so I knew there would still be room in between them for the squash.

Here are some pictures from today;

The rhubarb has grown, but the blueberries are still the same size.  The squash plants are doing very well in the holes I left for them.  I really like having them there, because it frees up space in our garden.  The raspberries at the top of the picture are bearing some fruit now.

I grabbed this headboard from the dump the other day and am using it for a support for some of our blackberries.
So far it is really easy to pull any weeds that grow through the mulch and I like how neat and tidy it looks.  Other than the blueberries, all the plants are thriving and there is so much moisture under the wood chips.

Thanks for stopping by.


Monday, March 23, 2015

2015 Canning Goal

I'm sorry to bore you all with my canning goal list for this year, but I'm afraid I'm a little disorganized when it comes to record keeping and at least now I can look back to stay on track.

I must say, this last few months we have almost completely depleted all of our home canned goods. We are down to just a couple of jars of strawberry jam, chokecherry jelly, zucchini salsa and pizza sauce. Oh, and 1 jar of mixed veggies (pure gold!).

This is what I hope to put up this year;

60 pints mixed veggies - onions, celery, carrots and green beans
30 pints apple sauce
28 quarts apple juice
12 pints & 12 1/2 pints strawberry jam
20 pints & 12 1/2 pints crab apple chokecherry jelly
6 pints & 12 1/2 pints chokecherry jelly
12 pints THM bumbleberry jam
42 pints dill pickle beets
21 pints zucchini salsa
35 pints stewed tomatoes (with zucchini)
14 quarts rhubarb pie filling
14 quarts sliced potatoes
21 pints pickled green beans
21 quarts dill pickles - (if I can grow cucumbers, which I have never been able to)
21 pints peaches

Now, I have to plan our garden accordingly. It's still covered in snow, so I have a couple of weeks before I need a hard fast plan. 

I have started the tomato, pepper and sweet potato plants and have the rest of the seeds at the ready. Although, I am waiting for my celery seed to come in the mail. It's hard to find here, because apparently, you can't grow celery here. But last year I grew beautiful celery, so I hope I can do the same this year.

Saturday, October 11, 2014

Sold Out at the Farmers' Market

Ben, Rebekah and I took our pumpkins and gourds to the last Farmers' Market of the year yesterday.  We only ended up with about 30 pumpkins (plus 9 that we kept) in our patch this year and about 40 gourds, so the Farmers' Market seemed the best way to sell them.


I didn't think they would sell because they were still a bit green.  The really green one one the pick-up is the Goosebumps variety and it takes a long time to turn orange, but I kind of like them green.  I couldn't believe the pumpkin frenzy we created!  We sold out of pumpkins in an hour and a half and we only came home with 10 gourds!

It was a fun morning.

Monday, September 8, 2014

Seriously?


This morning at our place.

My basement is full of about 30 lbs of green tomatoes:)

Friday, August 1, 2014

Quick Bee Sting Remedy


I have mentioned this on my blog before, but it bears repeating.  I heard about this quick remedy for bee stings 2 years ago from a friend.  She told me to quickly pour some bleach on paper towel and hold it on the bee sting for about 20 seconds.  We tried it on a child at VBS that summer and it seemed to work for them.

We haven't had to use it here until yesterday AND today.  Yesterday Jacob got stung on the inside of his foot. I tried this remedy, but it didn't work.  So we held an ice pack on it for about half an hour. Then today he got stung again, but on the top of his hand.  This time, the instant I put the paper towel on his hand, he stopped crying and said, "It's taking the sting away!".  He was good to go right away.  I don't know what the difference was.  Maybe a different insect, or the fact that his foot area was just skin and bone. Maybe it needs a little fat for the bleach to soak into.

Whatever the difference was, I was glad it worked the second time anyway.

This post is linked up to; Hope in Every Season Thrifty Thursday

Thursday, July 10, 2014

Month at a Glance

I can't believe it's been almost a month since my last post!  We have had GLORIOUS weather here and have been taking complete advantage of it. We also had our Stampede 2 weeks ago and we were able to take in 5 shows this year, including a free Corb Lund concert.  Probably only folks from Canada will know who that is:)

Anyway, here are some of the things we've been up to this past month;

We are in the middle of a garage build. Larry found a great deal for a 24x24 garage kit and bought it.  But before we build, we had to move our old "garage" out of the way. 


Larry and Rebekah are adding cross beams and braces so they can jack it up and put the wheels under it to move it.

Larry and Rebekah are half way to the new spot! I can't believe we moved it with our small tractor!

Just this week we were able to pour the cement pad.  You can see the old garage in it's new spot in the background. Hopefully we can get the TranX trailer cleaned out so that we can sell it to help pay for the new garage.

My hubby celebrated his birthday last weekend.

My Grandpa passed away last month. I will miss him.

Now on to my garden.  I am having huge troubles with the quack grass.  This is the first time this ground has tilled up and it is lacking all the nutrients it needs. We added lots of donkey manure and old straw.  Next year I'm sure the soil we be better. But, we are getting blessed with plenty of good plants growing.

At one end of the garden I planted a berry patch.  Here are some of the blueberries ripening. I can't wait!  We also have Haskap berries, raspberries, blackberries and rhubarb planted there.

A zucchini plant. I can't wait for zucchini this year. Otherwise known around here as Trim Healthy Mama pasta.

I planted a lot of cabbage this year. I love it fried with bacon, butter, onions and a little garlic. I'm going to cook up some and try freezing it.

This is canola.  I noticed as it started growing that bugs were eating it. And from the leaves, it looked like it is from the cabbage family. So, I left it growing around my cabbage and so far I don't have any bugs in my cabbage.

This is the first time I've grown kohlrabi.  In fact, I don't know much about it. But Larry bought me some seeds for Mother's Day because his mom always grew it when he was a boy. I was so excited to learn (after 20 years of knowing him) that there are other vegetables other than potatoes and corn that he would eat.  If anyone has any suggestions on what to do with it, I'd appreciate hearing from you.

And finally, some of our apple trees are producing this year.  We just had some hail last night though, so I will have to see if there if any damage.
We also went to the beach twice, celebrated Canada Day, had our homeschool field day and had a quick visit with our brother-in-law, nephew and neice.

Now, I'm off to a farm yard sale.  I'll post if I find anything wonderful.

Monday, May 5, 2014

Gardening in Alberta

This is our second year living on this acreage.  There was not a garden spot when we moved in and we didn't own a rotor-tiller until this past fall.  But that all changed this weekend. My husband braved the freezing temperatures and blowing winds to till up a garden spot. I asked him to pick the location so that it wouldn't be in his way and he picked a wonderful spot.  He tilled it up yesterday, then today him and Jacob worked for hours in their snowsuits spreading donkey manure on the whole garden. Then Larry tilled it again.  Just at the moment they were done and came in the house, it started snowing! 

This is Jacob and Larry in the morning spreading manure on the garden.

This is soon after the snow started. We got much more than this.

I am so happy and can't wait to get out there.

Saturday, October 12, 2013

No Till Pumpkin Patch - The Outcome

So, here is the outcome of our no till pumpkin patch.  It was a disaster!

The plants never hardly grew. It took forever for them to produce female flowers and the pumpkins that did grow, only grew very small.  We got about 20 little pumpkins and I planted enough plants to get between 1000-1200 pumpkins:(

I know why this happened, but I was hoping it wouldn't.  Because I decided after starting the process not to round up the surrounding area, the plants were competing for nutrients and water.  Plus, this land hadn't been used for growing before and needed a lot more fertilizer.  We had just gotten our pumpkin patch perfect for growing at our old place before we moved here last year.


Here are three of our little pumpkins
My conclusion is, next year we will need to cultivate the land and add LOTS of manure.  If we have a roto tiller, I will try to space the rows so that we can run the tiller in between for a while.

I'm sad it didn't work out this year and I know a lot of people from around our area were sad as well. But, hopefully we'll be back next year!

Friday, August 9, 2013

County Fair Results

This has been a hectic week! We had decided not to enter anything in our fair this year because they have raised the prices so much that we aren't going to the fair. BUT, the bench show is at a different building and we just decided a week ago to enter our work.  Rebekah entered 26 items, Jacob - 9, Ben - 4 and I entered 27.

So, we have just returned from seeing how we did and our family really did well!

Here are some highlights.

Rebekah received High Point in the Junior Division 2 and Runner Up High Point for the Ag Division.


In the following pictures, everything you see is basically all Rebekah's work and all 1st places.

Everything along the back is  Rebekah's (From the left: Christmas card, button bouquet, clay crab, painted rock, painted ceramics, ruffled scarf, perler bead balloon, bottle necklace and cross stitch picture))

Rebekah's Jam, muffins, cookies, bread and fruit

Rebekah also entered items into the adult divisions. She won 2nd against me for the Fleischmann's Yeast competition. Benjamin won first for his Robin Hood Brownies and I won 1st Robin Hood Ginger cookies and 2nd for my Certo strawberry jam.


Here are just a few more highlights.

I made runner up in the Culinary Arts Division


My Peas at the top won 1st. (It's about the only thing I grew this year)

Ben won 2nd for coloring a picture from VBS and Jacob won 1st

Jacob won 1st for his clay animals and stocking he sewed

The boys made this catapults at VBS and Jacob won 1st and Ben won 2nd
So, there is the short version! Ha Ha. Now, we are going to watch the old Disney "Swiss Family Robinson" movie and eat popcorn.

Wednesday, July 17, 2013

No Till Pumpkin Patch Update

Well, here we are in about week 8 of our pumpkin patch and I must say I'm a little worried of how this will all turn out.  I realized not that long ago that I won't be able to use round up.  I thought that the grass would grow back next year, like it does every year after it dies. BUT, I have heard that it probably won't grow back, but weeds will.  SO, I have decided NOT to use round up at all.  My only line of defence against weeds and grass overtaking the pumpkin plants, is mowing.  Which I would gladly do, if we didn't just break the belt on our tractor for the 3rd time in just over a month!  It's $70 every time to replace it.  I'm hoping to find a push mower at the town wide garage sale this Saturday so that I can mow a few more times as the plants grow and spread.

All I can see in my mind now is pumpkins growing in an over-grown field. It might just be a great big mess by the time it's done.

On a happier note, it all looks good right now.  And here are some pictures.  The first 2 are from a week and a half ago and the last 3 are from today.  The taller plants are the sunflowers I planted in the middle.


In regards to mowing, I have learned a lesson about the "hills".  If I were to do this again, instead of hilling up the dirt, the way they say to do for planting pumpkin seeds, I would pat the dirt flat in the hole we dug.  I would make sure the dirt was about 2 inches below the grass. That way, it would be very easy to mow right up to the young plants, without disrupting any of the hill.  Also, it would retain water in there.
 
I will keep you updated on how this patch is doing.

Monday, July 15, 2013

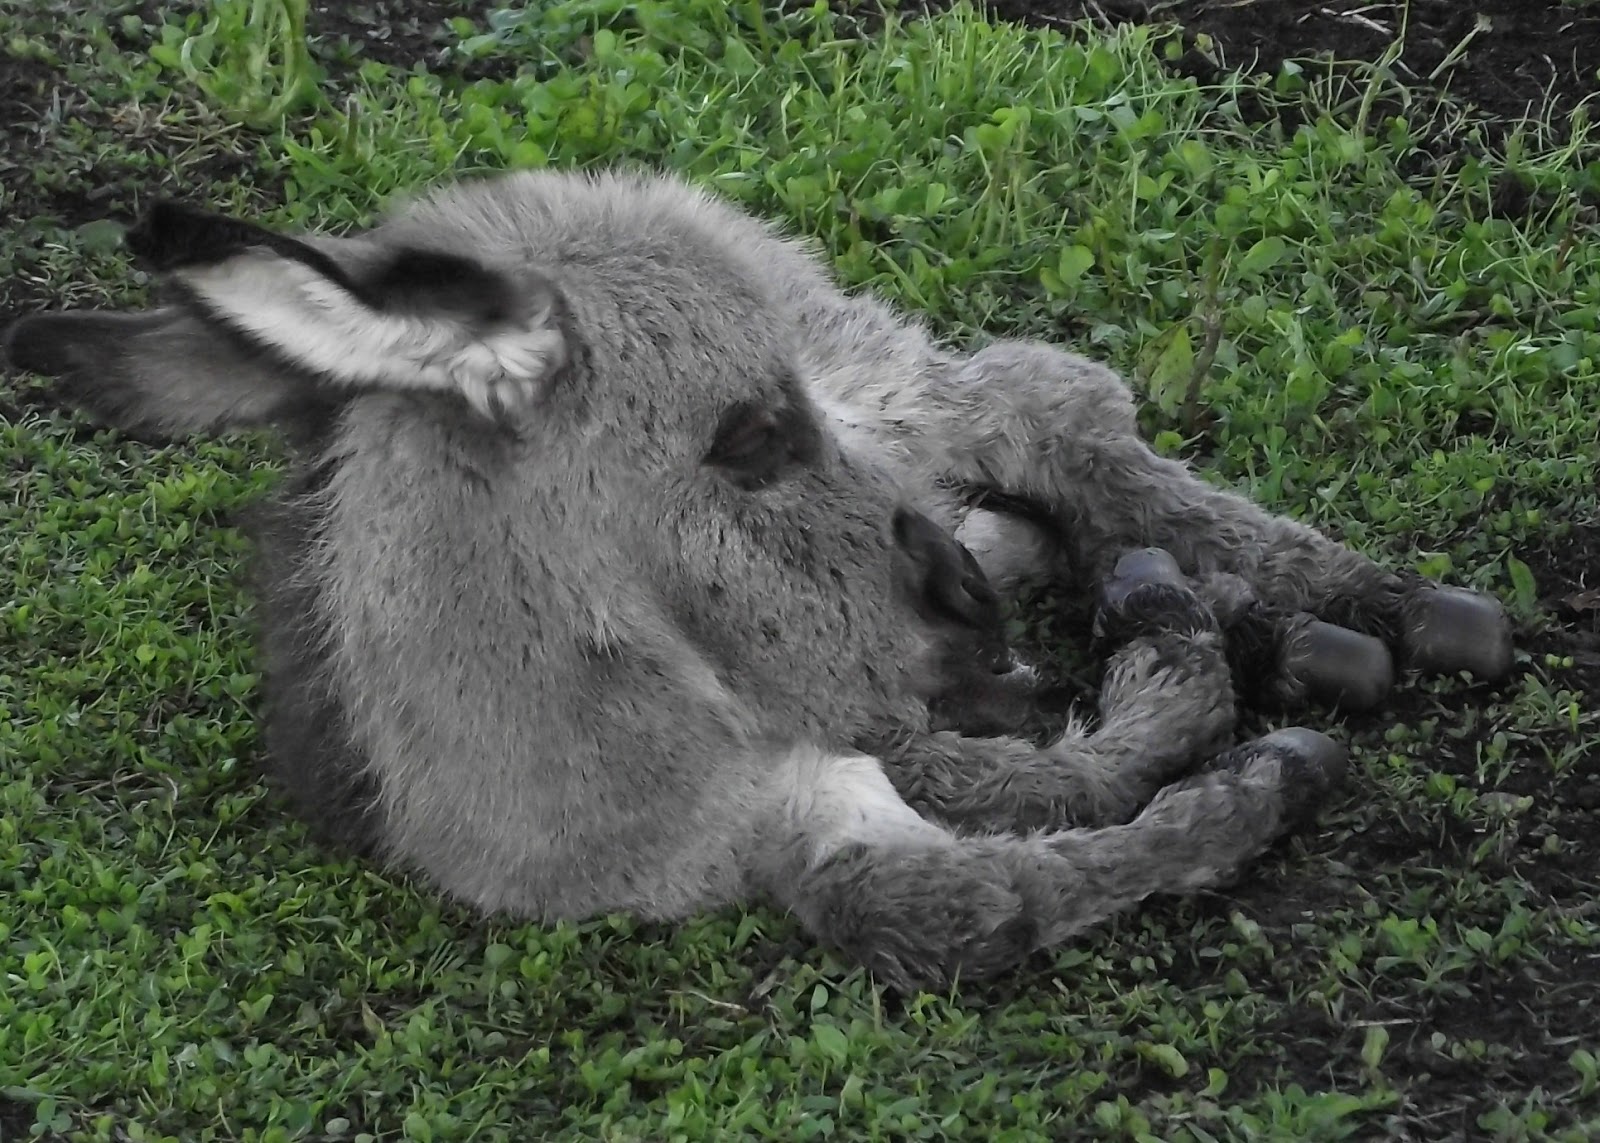
New Baby Donkey - Birth Problems and Natural Remedy

We had a wonderful new addition to our barnyard today.  Molly finally gave birth to her baby.  I say finally, because Molly was pregnant for 13 1/2 months!  It seemed like the baby was never going to come.
But our joy soon turned turned to worry.  The baby was born with something terribly wrong with it's bottom lip. We just thought it was some kind of birth defect. You can see it in the pictures below.


What a beautiful donkey, eh?  We didn't know what to do, but we weren't extremely worried because he was nursing with no problems and Molly was being such a good mama. Remember last year when Molly had Jemima, she wouldn't let her nurse.

I took the pictures of him (we think it's a boy, it's hard to see there just yet) and sent them to a friend of ours that has lots of horses to see if she had any suggestions. If not, we were going to show the vet tomorrow to see what he says.

Our friend, Monica, called us tonight and said she and her husband would like to come over and see the donkey in person.  When they came they had an idea that might help the little guy.  Monica thought it might have been a PROLAPSED lip.  Meaning, some kind of trauma during birth caused the lip to swell up.

She had seen this when cows give birth and prolapse.  She had also seen an old farmer treat this condition by rubbing the prolapsed area with sugar to get the swelling down, then putting the body back in the right places.

So, Monica poured warm water on the lip to get it moist again as it was pretty dry. Then she rubbed a fair amount of sugar on his lip which brought down the swelling almost immediately. Next she gently pushed the lip back up into position and held it there for about 10 mins.

When she let go, the swelling was gone and his lip was staying in place!  His lip is kind of stretched out, so it's pretty loose and it seems his bottom jaw is extended a bit, but we will keep an eye on him, it might get better on it's own.


We don't know yet if this was a complete fix for him, but it seems to have really helped.  I am SO grateful to Monica for taking the time to come and for the information she had learned from that old farmer years ago.

And I am thankful to God for helping this little guy, who we have already fallen in love with.

This post is linked up to 1840 Farm, The Prairie Homestead

Tuesday, June 11, 2013

Cutworm Prevention - No Till Farming Update

I have been busy out in the pumpkin patch this last week.  So far our No Till Farming Method is working just fine.  BUT, I did notice when we were filling the holes with the beautiful composted manure dirt that it had cutworms. Cutworms are a serious threat to all gardeners and farmers.  They are awful, grubby worms that stay just under the surface of your dirt, looking for tender new plants to cut down and eat.

Photo source: Wikipedia
At our old house, I had a serious problem with cutworms and learned this technique to prevent them from eating my plants.  It doesn't kill them though, so as I find them, I kill them myself.

If I had remembered this trick when I was planting the pumpkin seeds this year, I would have saved myself a bunch of time and effort by just doing it while I was planting the seeds.

Because cutworms stay just below the surface, any barrier will prevent them from getting at your plants. So, I cut cheap card stock into 1/2" strips and tape them in a circle.


Then I went out to the pumpkin patch and made a circle in the dirt with my finger around each little pumpkin plant. Then I pressed the paper ring into the dirt, encircling the plant and protecting it from the sinister worm.  While I was doing this, I found 3 victims already.


I didn't count, but I'm sure I had to make a few hundred of these rings. Like I mentioned earlier, once I saw the cutworms, I should have planted the seeds right in a paper ring in the dirt.  I did this at our old place, but the chickens were drawn to the paper and scratched up many of my pumpkin hills!  This year, because of the many predators around here, we have the chickens confined in the barnyard:(

I did a check in the patch today and all the plants are doing great and growing so nice.

This post is linked up to My Healthy Green Family