Thursday, April 28, 2016

Plate Stand

I just adore these plate stands and they are so easy and inexpensive to make.


I bought the big dish from Dollarama. Which you can kind of tell because they are all a little warped along the top.


I used an old glass candle holder for the base.  They worked so great for this project, because the bottom of the candle holder fit perfectly in the circle on the bottom of the plate.

This is the top of the candle holder, which will be on the bottom once it is glued on.

I painted the candle holder with chalk paint and then I spray sealed it a couple of times to protect the paint.
This is the bottom of the candle holder that is glued to the plate.  This one is painted grey.

Once the candle holder was completely dry, I sanded the paint off the edge where I would be gluing it so that it would be a true bonding. Then I glued the bottom of the candle holder to the bottom of the plate using "Goop".  I found it takes this Goop glue about 4 days to dry to the point where you can't move it around anymore.  So, if that's the kind you use, be careful not to move it too much for the first few days.

I wouldn't want to submerge this stand in water, but it is washable.
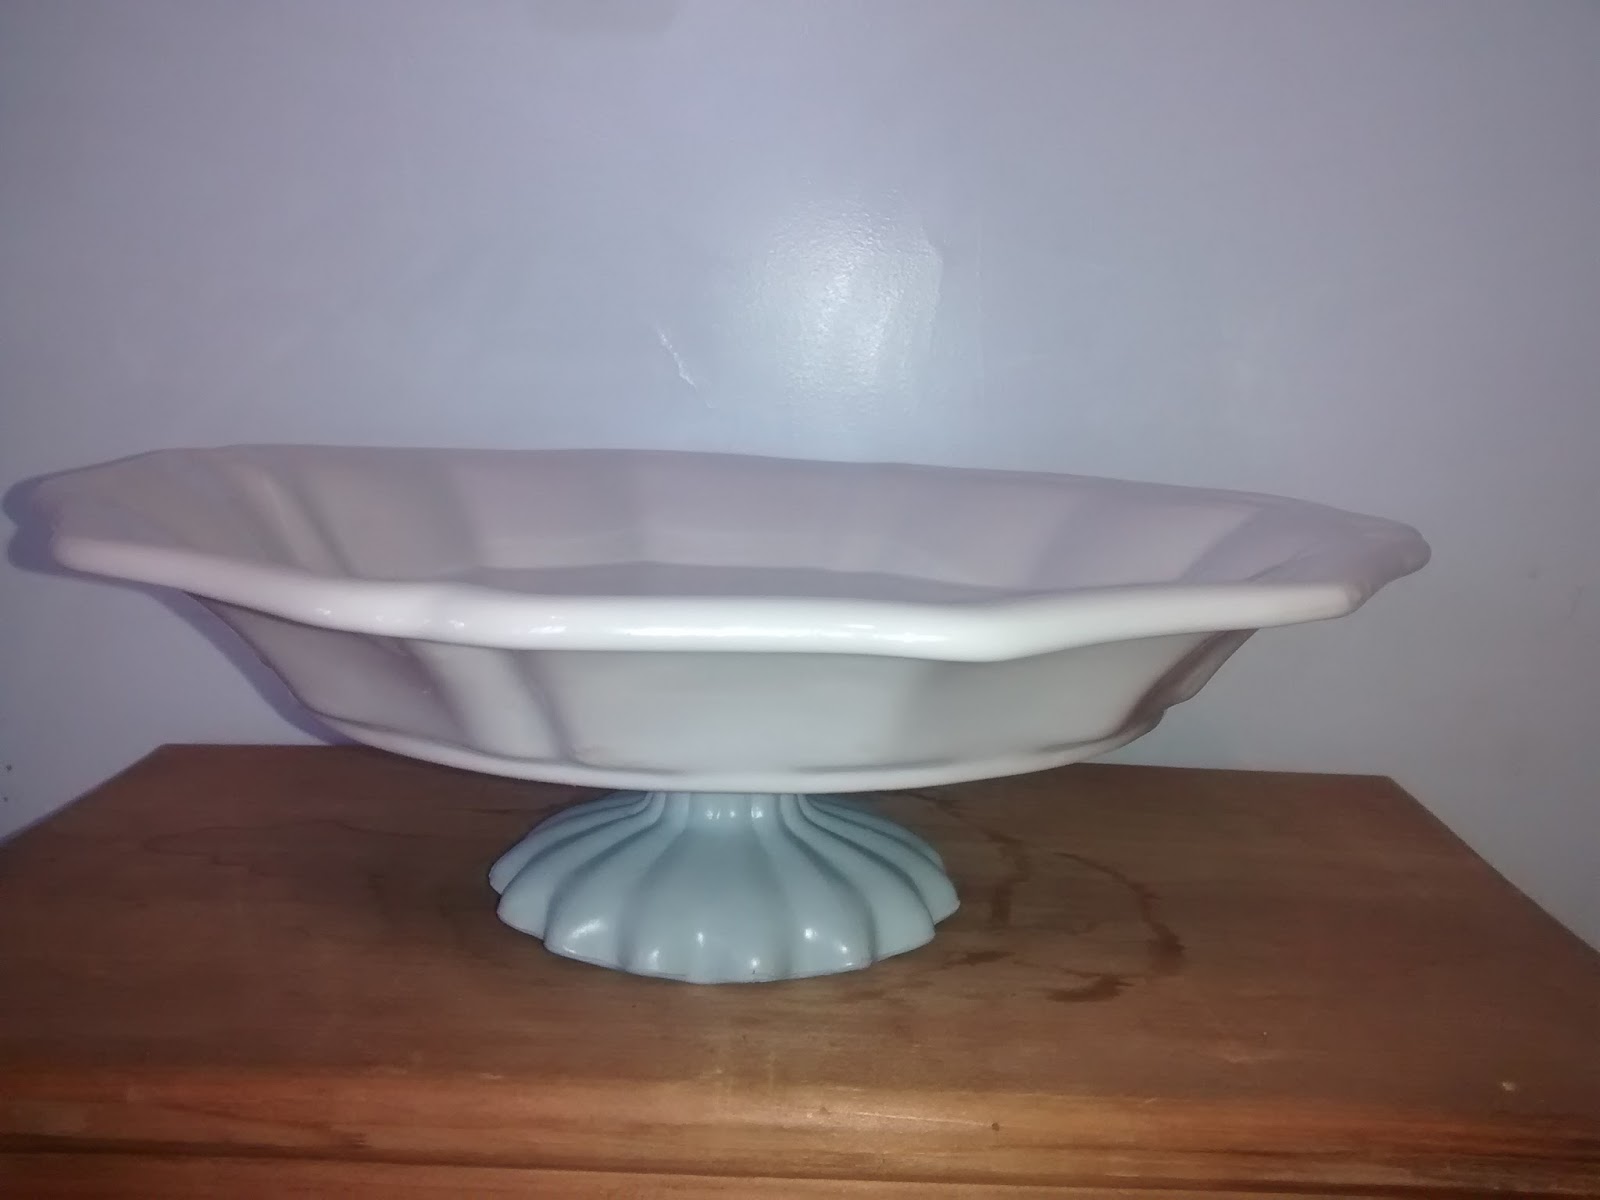
This one I'm keeping. I love the blue base.


I think they turned out pretty cute.

Thanks for stopping by.

Crystal

This post is linked up to'

Vintage Charm
Anything Blue Friday at The Dedicated House
Vintage and Thrifty Finds
Wake Up Wednesday "Linky" Party
Talk of the Town

Friday, April 1, 2016

Making Tomato Sauce From Frozen Tomatoes

I have finally processed the last of my frozen tomatoes. I still had about 30 lbs in the freezer and needed to free up that freezer space.  I have already canned lots of tomatoes and more salsa than I can count, so I figured we need some tomato sauce.


Now, I love freezing our garden tomatoes whole in the fall.  That way I free up my time to process the other garden fruits and veggies in the busy season.  Then, when everything has quieted down and I feel like canning, I have them ready.

Also, when you freeze tomatoes and after they thaw, the skins just slip off. So no need for boiling them.  Bonus!!!

The skins didn't really bother me for this recipe anyway.  Garden grown tomatoes tend to have thinner skins and I was running them through my food processor.

Tomatoes thawing out.

Ready to be processed.

I just made a very simple recipe.  I cooked 3 chopped onions in about 1/2 olive oil.  Then I added 8 cloves of minced garlic.  Then I added all the processed tomatoes and salt and 2 Tbsp crushed chili peppers.  I cooked this until it reduced by about 2 quarts. Then I added a big can of crushed tomatoes and 156 ml can of tomato paste.

I'm sure I could have processed the jars in a water bath, but I chose to do it in my pressure canner because of the oil.

I ended up with 18 pints when it was all done and now I finally have a little bit of freezer space.

Thanks for stopping by.

Crystal


2 Corinthians 9:6

6 But this I say: He who sows sparingly will also reap sparingly, and he who sows bountifully will also reap bountifully.

Sunday, March 27, 2016

Happy Easter

Happy Easter everyone!

I just wanted to share some pictures of these Ukrainian Eggs Rebekah and I made the other night. Our neighbour invited us to a class to learn how to make them. We jumped at the chance!! I had gotten some tools from my Grandma before she died and promised I would learn how to make these eggs and I have done it!

We chose a traditional Ukrainian design.  It has an 8 pointed star, which symbolizes God's love toward man. Which is so beautifully demonstrated at Easter when we celebrate Jesus' death and resurrection to pay for our sins.


These are the tools I got from my Grandma. (Sorry the picture is so dark)


God Bless you all,

Crystal

Saturday, March 26, 2016

How Do You Start Letting Go?

This past Friday my little girl, who has been my helper, companion, cheerleader and so much more turned 16.  She is becoming such a wonderful young lady.  She is bright and still likes to serve. She plays violin and guitar for the elderly and worship at church.  And she enjoys spending time with friends.  One of her good friends took her out to dinner and a hockey game on her birthday.

It was hard for me to let her go. She has always been around home as we homeschool.  This is a new stage for me that is exciting, because I love to watch her grow into the woman God has planned for her, but a little sad, because things are changing.  This must be some kind of weaning stage for parents to get more and more used to their kids not be around all the time as they used to be and eventually moving out.  I will cherish everyday with Rebekah and the boys.  In fact, I will cherish the time Rebekah and I had together earlier on her birthday.

Because she turned 16, we started to let her wear make-up and to kick it off, I took her for a free makeover at Shoppers Drug Mart.  The lady did a good job, but I feel she put the make-up on a little heavy.  When she was done, I bought her just a few items of make-up.  Then we had lunch at Subway.  On the way home, we swung by Dairy Queen and got an ice cream cake to have at home with Larry and the boys.  We also opened presents then.

Here are some pictures;

Rebekah's friends, who live along a highway put this birthday message up for her. It says "Happy 16 Birthday Becky!"

In the make-up chair

I got Rebekah 16 presents, some from the thrift store and others not.

Rebekah and Ben

Me, bringing in the cake.

Rebekah and her friend at the hockey game.

If anyone has any advice for me, please feel free to leave a comment. I know it'll all be alright and I will go on.  I will have to choose to love every stage my children go through, including growing up.

Psalm 127:3 (NIV)

 Children are a heritage from the Lord,
    offspring a reward from him.

Thanks for stopping by.

Crystal

Thursday, March 17, 2016

Twine and Lace Eggs

I have made a few sets of these spring eggs this past week and I  really like the way they turned out.


I used the cheap plastic Easter eggs to make them. Before I wrapped them in twine, I glued the eggs shut and spray painted them brown in case of little gaps in the twine.  I'd hate to see bright pink shining through.


When they were ready, I started out the twine by gluing the beginning of the twine to the top of the egg.  I let it dry so that the twine was secured. Then I was able to start wrapping the twine around the egg, gluing as I went.

Once it was wrapped, I added the embellishments, such as lace, buttons, raffia and lace flowers.  I always find a way to use a brown paper tag.  I think they are so cute on things.  For these eggs, I stamped the word "JOY" on them.


Here they are ready for market.


Thanks for stopping by,

Crystal


This post is linked up to:
Frugal Mommas Friday Linkup
Share it One More Time Inspiration Party
Vintage Charm
Welcome Home Wednesdays

Friday, March 4, 2016

DIY Jar Soap Dispenser

These jar soap dispensers are quite quick and easy to make.


I made some last year with the blue and green coloured glass jars, but this time I painted the jars with chalk paint.  I found some paint at our local dollar store.  I will probably try to use a Micheal's 40% off coupon to get a can of spray chalk paint.  I found painting on glass with a paint brush hard to smooth the brush strokes.  I also had to paint about 5 coats to get the coverage I wanted.  I also painted both parts of the lid with off white chalk paint.

Once the paint was dry I took some coarse sand paper and distressed it.  Then I sprayed it with matte clear sealing spray with 2 coats.

When I made the soap dispensers in summer, I just kind of punched a hole in the lid with a screw bit and screws and bent back the rough metal edges underneath the best I could. It looked pretty sloppy.  This time my husband happened to be watching me and said he could do a better job. I had no doubt about that!  He put the snap lid onto the jar with the screw band and screwed a hole with the biggest bit he had.  
You can tell the lids I pucnhed the hole in and the lids Larry drilled the holes nicely.
It was a bit too small, so then he used sand stone round bit and just used it until it was the right size.  He also used this bit to sand the rough edges off the underside.


For the pumps, I bought liquid soap on clearance and from the dollar store.  I washed the pumps and cut them to size.  Then I glued them in place with this glue called Goop.


Now, I just put it all together and tied some twine around the top and Voila!


But those aren't the best ones I made. Take a look at the one I made myself last summer.  I hadn't painted it and couldn't see the image on the jar.  The only reason I made this one for myself was the image. I have never seen another jar like this one.

I had to use up some extra soap. That is why there is two colours.

Here it is after I painted it with olive green chalk paint.


I love, love, love it!  And I wish I could find more jars like this.

Thanks for stopping by,

Crystal

This post is linked up to;

Anything Blue Friday  
The Everyday Home
Vintage Charm Party
Amaze Me Monday
Sunday Showcase Linkup
Tweak it Tuesday
Show and Share
Something to Talk About
Welcome Home Wednesdays
Winter Blues Wednesday
Talk of The Town
Wake up Wednesday

Monday, February 29, 2016

Easy Crocheted Baby Booties

(Scroll down for pattern)
So, I have been having fun crocheting these baby booties lately.  I was using this Red Heart pattern.  But, I didn't like how big the toes were.

The original pattern.

On the rows that make the toes, the pattern has half double crochet stitches along the side, then double crochet on the round part.  I thought it might look better if I just used the half double crochet stitch along the whole row.

The revised pattern

I know it's hard to see the difference, but the revised booties are more fitted.  I also extended the top part 2 rows, because I think that's cuter.

Here is the revised pattern;

hdc2tog = Yarn over, insert hook into st and draw up a loop, yarn over and pull through 2 loops, yarn over, insert hook into next st and draw up a loop, yarn over and pull through all 4 loops.

Ch 9.

Round 1: Work 2 dc in 3rd ch from hook, dc in next 5 ch, 6 dc in last ch, turn to work along opposite side of beginning ch, dc in next 5 ch, 3 dc in last ch, slip st in top
of beginning ch to join. - 22 sts

Round 2: Ch 2, hdc in same st as slip st, 2 hdc in each of next 2 dc, hdc in next 5 dc, 2 hdc in each of next 6 dc, hdc in next 5 dc, 2 hdc in each of next 3 dc, slip st in top of
beginning ch to join. - 34 sts

Round 3: Ch 2, hdc through back loop in each st around, slip st to top of beginning ch to join. - 34 sts
Crocheting in the back loop

Round 4: Ch 2, hdc in next 8 sts, [hdc2tog] 8 times, hdc in next 9 sts, slip st to top of beginning ch to join. - 26 sts

Round 5: Ch 2, hdc in next 8 sts, [hdc2tog] 4 times, hdc in next 9 sts, slip st to top of beginning ch to join. - 22 sts

Round 6: Ch 2, hdc in next 8 sts, [hdc2tog] 2 times, hdc in next 9 sts, slip st to top of beginning ch to join. - 20 sts

Round 7: Ch 2, dc in each st around, slip st to top of beginning ch to join. - 20 sts

Round 8: Ch 2, hdc in each st around, slip st to top of beginning ch to join. - 20 sts

Round 9: Ch 1, sc in each st around, slip st to top of beginning ch to join. - 20 sts

Round 10: Ch 2, dc in each st around, slip st to top of beginning ch to join. - 20 sts

Round 11: Ch 2, hdc in each st around, slip st to top of beginning ch to join. - 20 sts

Fasten off.


Thanks for stopping by,

Crystal

This post is linked up to;  Monday of Many Blessings Link Up   Happy and Blessed Home   
Frugal Momma's Friday Linkup  Sunday Showcase Linkup   Something to Talk About